Opening ports to host a server can be an easy task but sometimes even opening ports you still get error messages or players cannot connect to your server. Well opening ports alone is not enough if you have software blocking incoming connections so on this tutorial we will analyze it and learn everything you need to know about server hosting and how to let other people connect to your server on Minecraft.
Opening Ports 25565
If you have already opened / forward ports to 25565 then you can skip this step, if not continue to read.
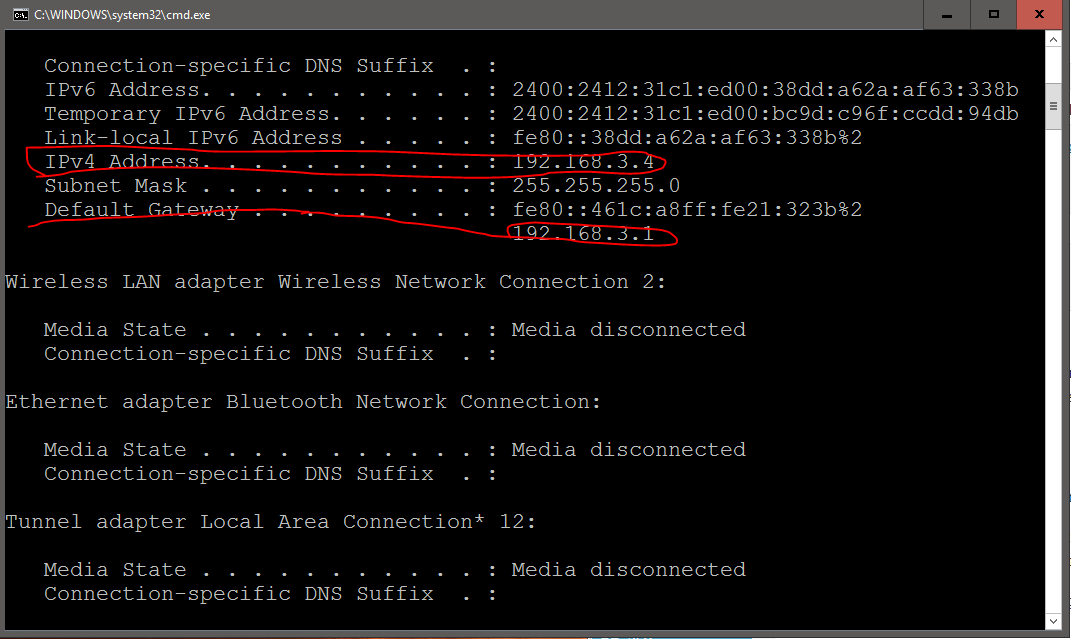
First of all you need to find out what your current LOCAL IP ADDRESS is. This local ip is the network number assigned to your computer by your router device, to find out what your local ip is press Windows key + R -> type “CMD” and press ENTER -> type “ipconfig” and press ENTER.
Now a bunch of lines and text should appear on the black window, find this text “IPv4 Address……” and the numbers next to it is your LOCAL IP ADDRESS!
Find this “Default Gateway” and the numbers next to it is the address of your router.

Opening Ports Part 2
Now that you have your local IP and router address we need to open your router settings and open ports 25565 to your local ip address.
To do this enter the Default Gateway number in your browser just like an website and press enter, you will be asked for username and password, this credential details can be found in your router manual. Usually it’s username, and password or admin, pass but it varies with router types and models so you must find it by reading the manual that came with.
Once you have succesfully logged into your router we can adjust the settings and open ports now.
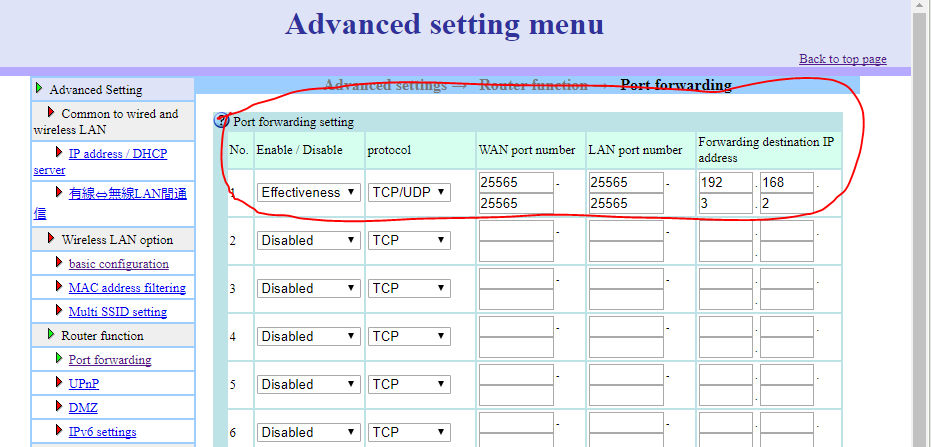
Find a text similar to “Port Forwarding” or “Open Ports” or something like “gaming” this text also changes depending on your router type.
In the Port Forwarding settings you will have the option to enter destination Ip address, TCP, UDP, port number, enabled / disabled.
Choose enabled and select TCP/UDP and in the port number enter 25565 – 25565 and in the destination ip address enter your LOCAL IP Address we talked about earlier. Press save or ok and you should be able to host a server now!

Firewall
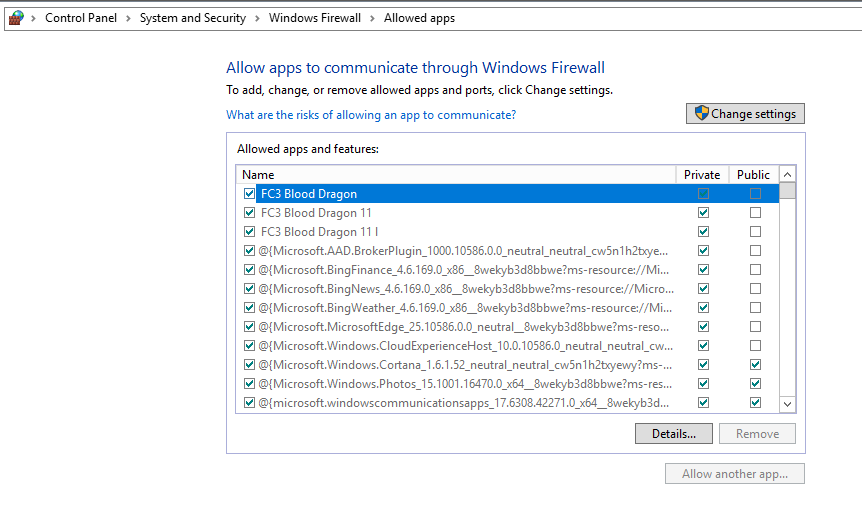
If you have firewall activated it’s most likely it will block any incoming connections to your computer, you have to disable it or white list minecraft server in the settings.
To allow an app go to: Control Panel > System and Security > Windows Firewall > Allowed apps and click the button “Allow another app…”

Anti-Virus
Anti-virus will also block any incoming connections to protect so you will also have to either disable it or allow / white list your server in the anti-virus settings.
Windows Firewall
Windows have built-in firewall. When you start running the Minecraft server it will usually block some ports for your safety. If that happens, Windows will prompt you asking if you want to allow/block the port. Make sure you click “Allow”.
Still have questions ? Leave a comment below or contact us.
