
Last update was: October 4th, 2023
Visit again soon.
INFORMATION: There was a problem with the submission form and the message was not delivered. The issue has been fixed and you can use the form below to send messages or request new problems.
October 4th, 2023
If your problem is not listed, send us a message and we will analyze it and add to the list.
No personal data is collected.
You’re free to include your email address if you need a response.
Thanks for downloading Alienbunker DTG Diagnostic Tool.
With this tool you can search through our database of issues and see how to fix them.
In the near future, we will start a service that will allow you to upload videos of your problem, and get professional help to solve the issue.
Last update: Recently
The problem is in the print head lock mechanism.
This can happen when the print head tries to move outside the capping station while still in lock mode. Solution 1: On the right side of your printer, there’s a hole with a white plastic screw inside. Use a flat screwdriver and rotate it a few times and start again. Solution 2: If the first solution doesn’t work, try again a few times, and if it still doesn’t work then you will need to replace the capping station with a new one. It’s possible that the gears below are out of sync or worn out.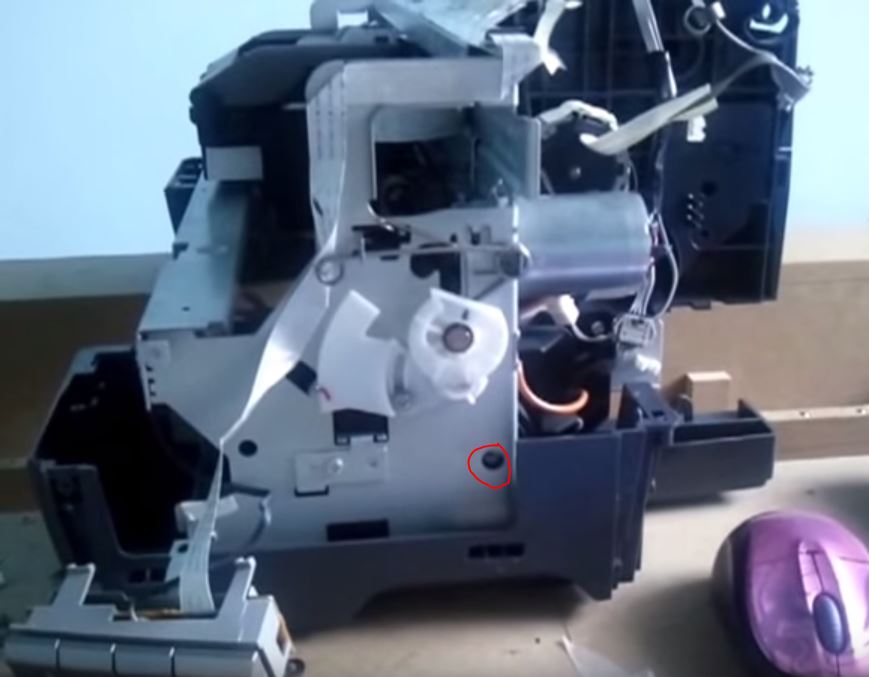
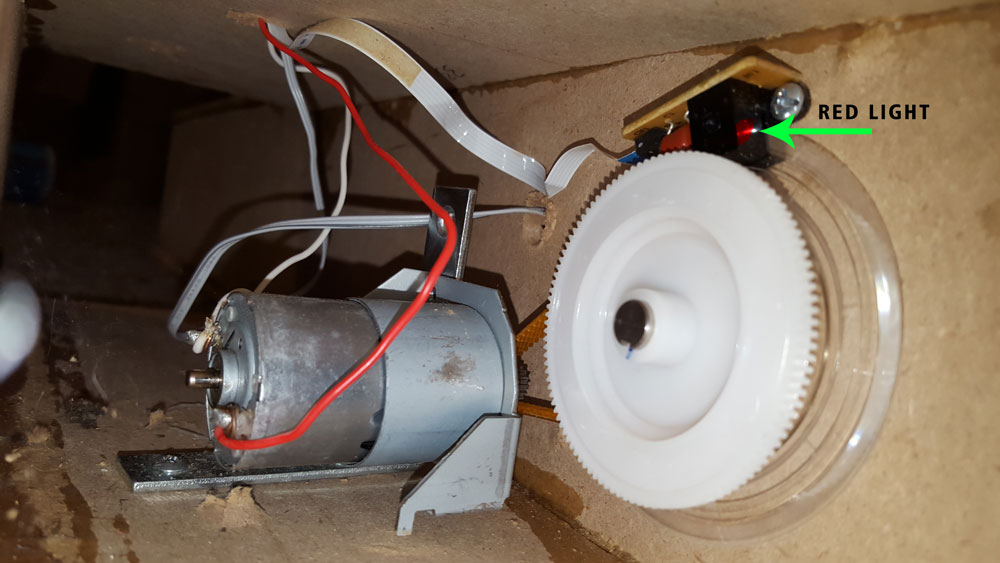
This can happen when the encoder sensor fails to detect/read the transparent disk properly.
Solution 1: Check if the encoder sensor is properly set and there’s a red light coming from the sensor when printer is turned on.
This could be an issue with the timing belt or the platen movement.
Solution 1: Check if the DC Motor timing belt is firm and not loose.
Solution 2: Check if the platen has enough grip on the moving rod / timing belt.
Solution 3: Check if the print head has the correct gap between the garment & platen. Correct gap is 2mm.
This can happen when there’s a problem with the APG Motor located on the left side of your printer.
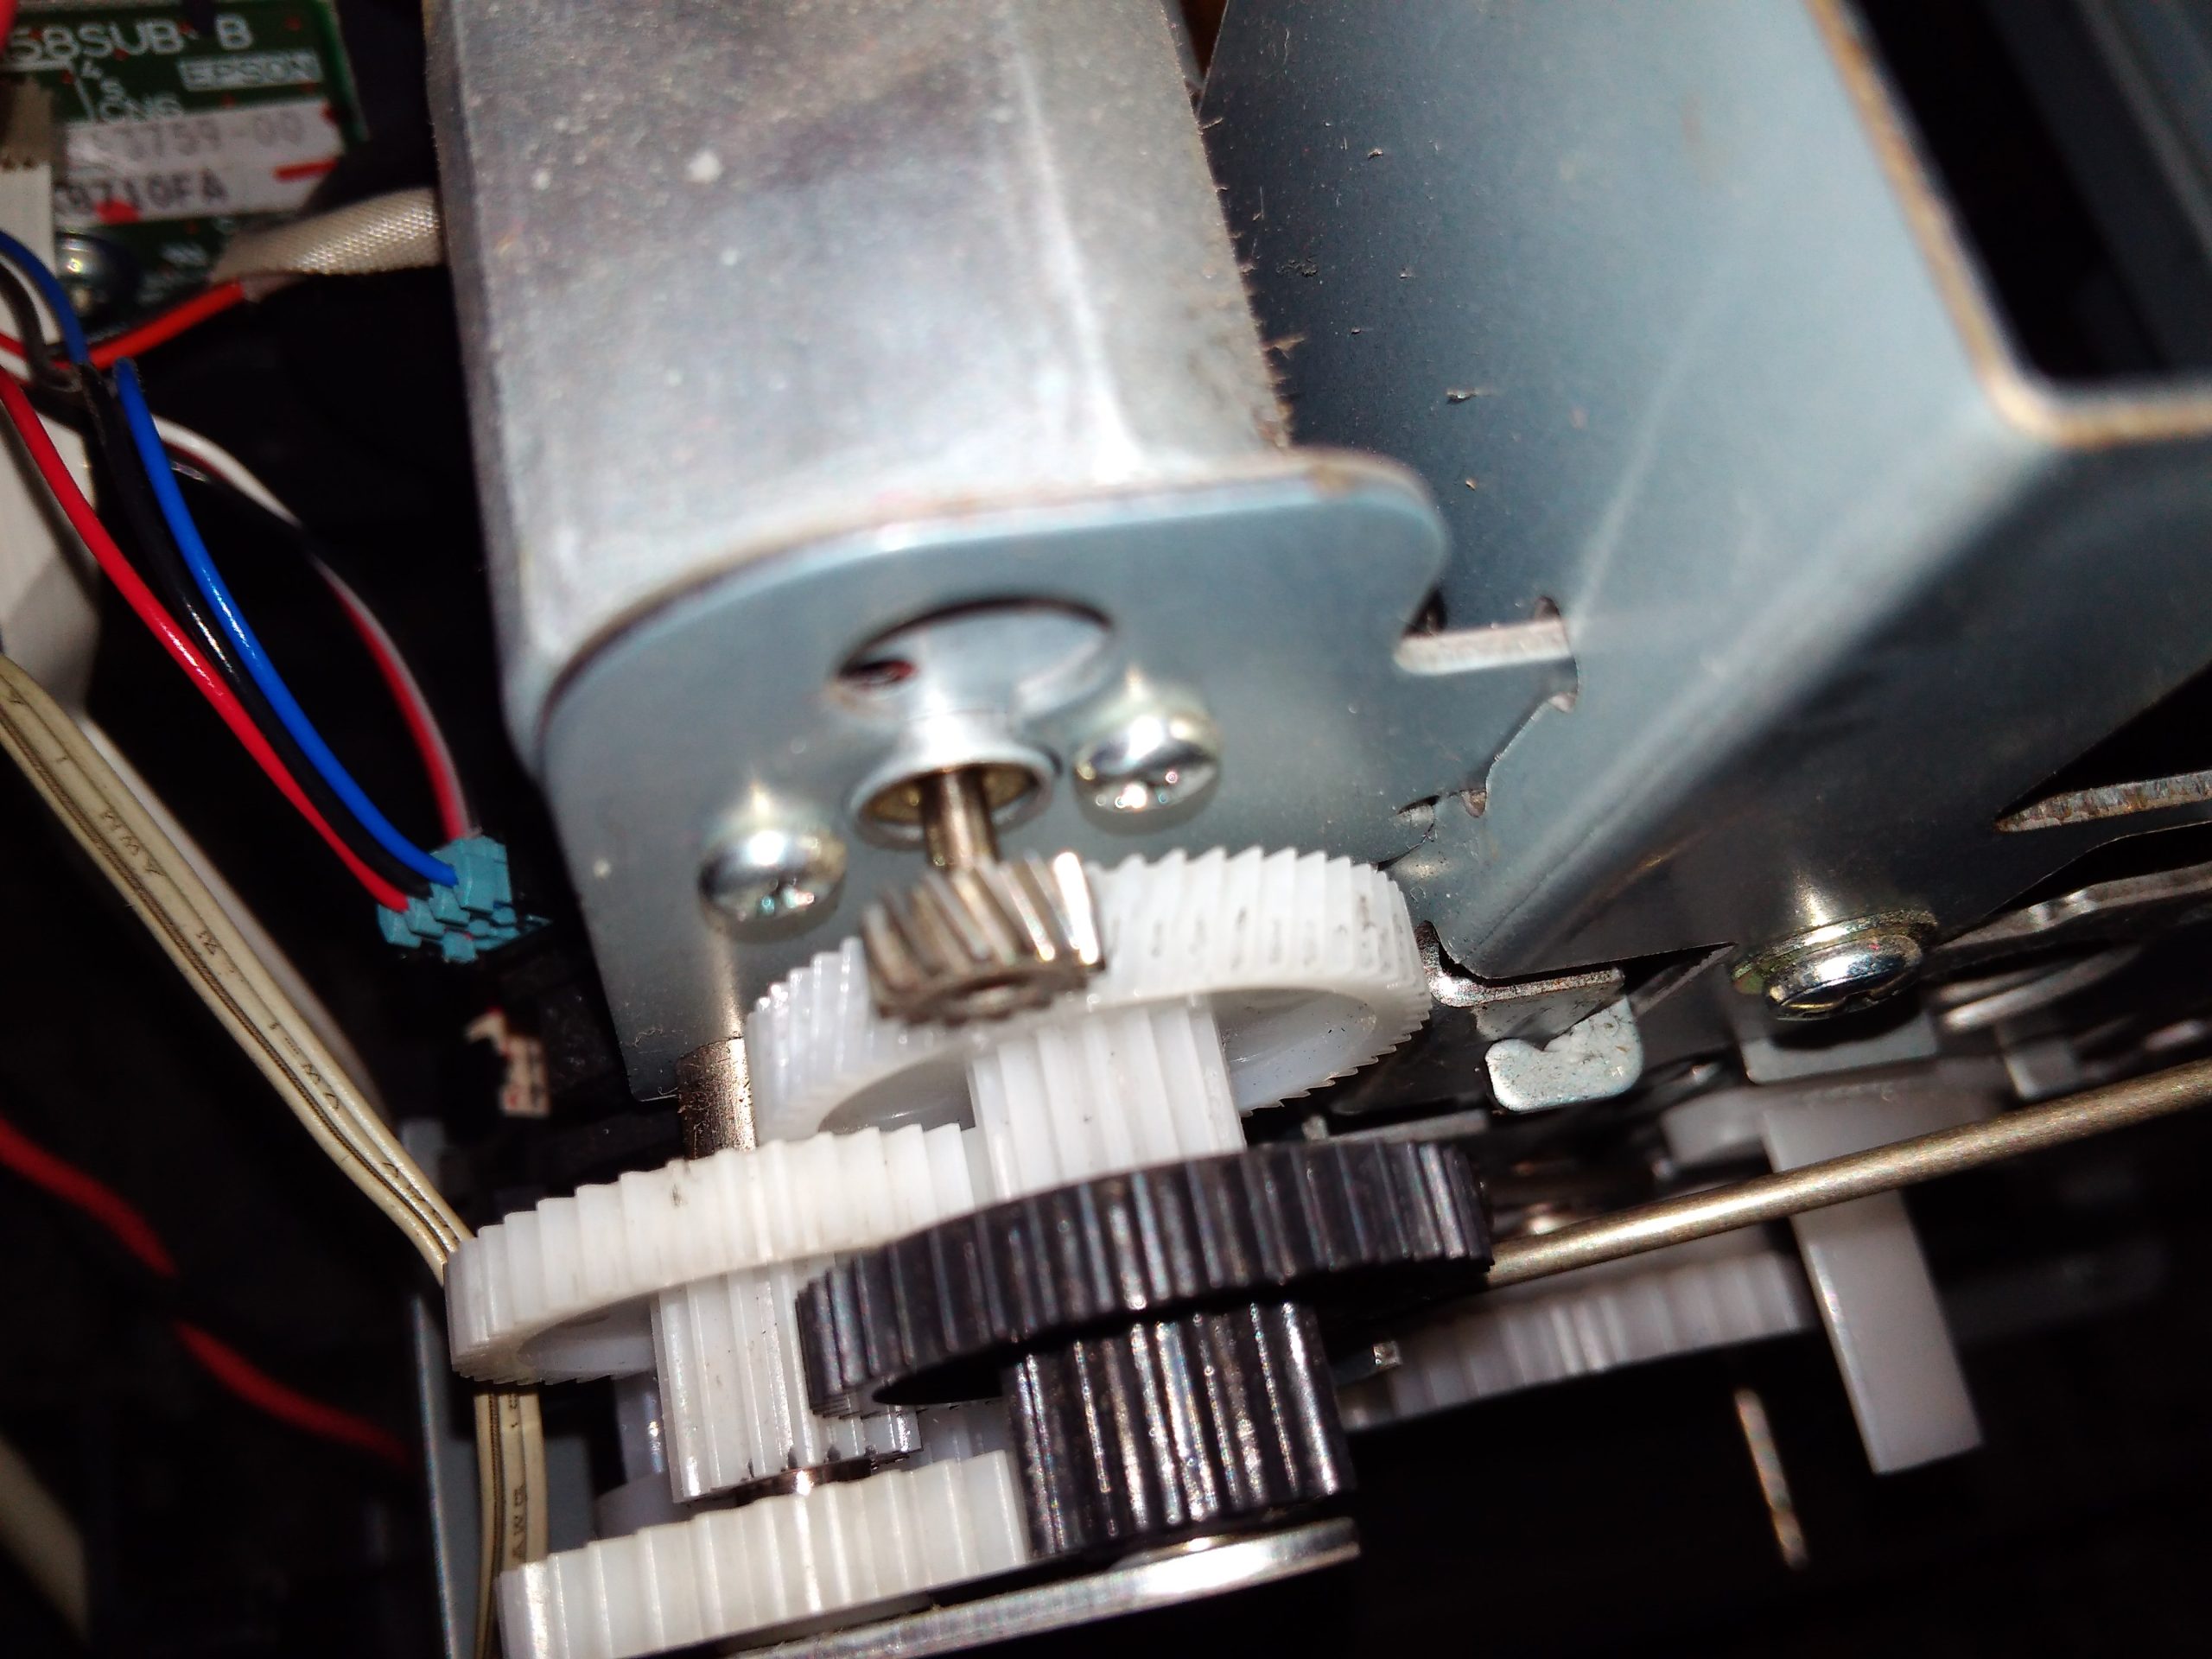
Solution 1: It’s most likely the gears are out of sync. Check if the gears is turning and if there’s anything preventing it from rotating freely.
The cause for this error is because the PW sensor was triggered when it was not supposed to. It can happen if it detects any jammed paper inside the printer, dust, or ink particle in the sensor, or a damaged print head.
Solution 1: Make sure there is no foreign object inside the printer, and the print head is clean.
This could be related to the waste ink pad level. Every printer has an internal counter that will make the printer stop completely when this waste pad level reaches 100%.
Solution 1: The counter needs to be replaced / reset. Contact us for further help.
Was ink coming out before? Is ink coming out but very little or absolutely nothing after cleaning?
Solution 1: If ink was coming out even if it was just a little, you might have damaged the print head electronics when the cleaning solution was injected inside the print head. If that’s the case, you will need to replace the whole print head unit.
The cause of this is when the DTG ink dries inside the print head.
Solution 1: Inject the cleaning solution inside the print head, and let it sit for 2-4 hours to let it dissolve the dried ink.
Make sure you’re using cleaning solution made for your printer model. Do not use alcohol or any other corrosive substance.
You send a print job, print head moves to the left, platen moves forward, then you get a paper jam error.
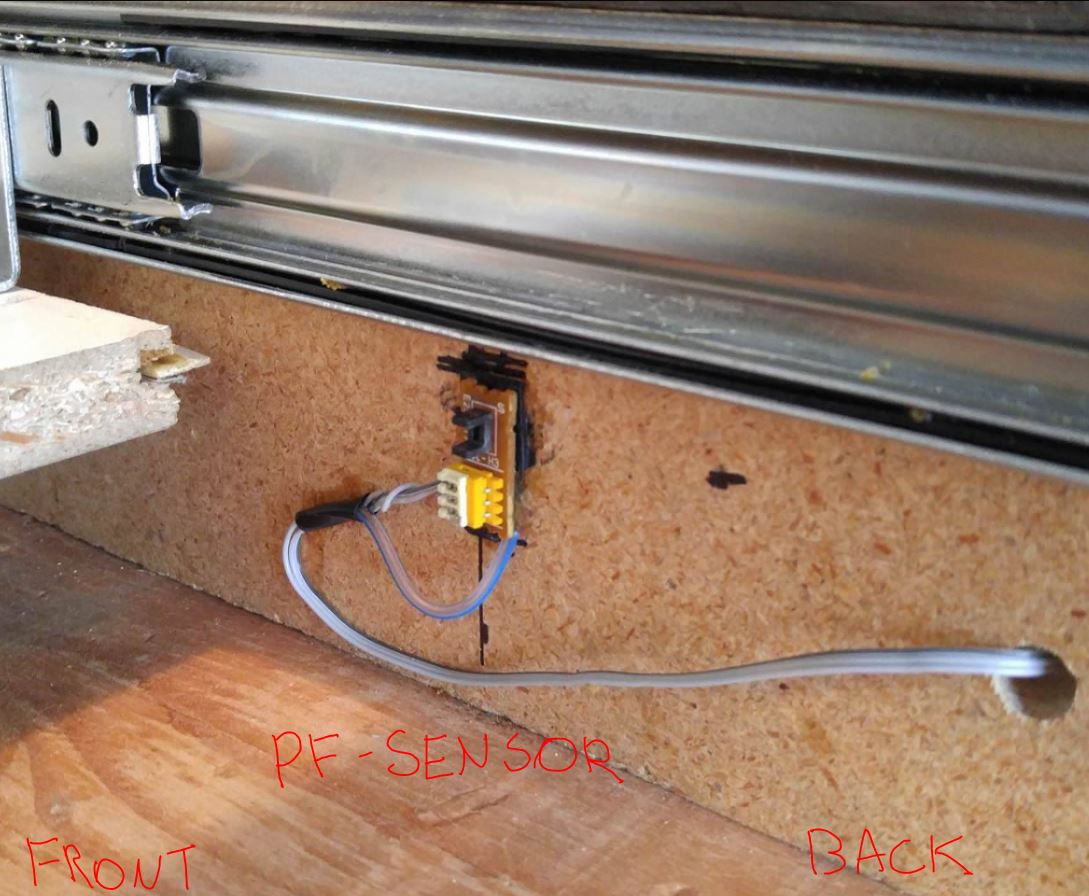
Solution 1: This can be caused by the PW sensor or the PF sensor.
PW Sensor (located beneath print head) – Depending on how your printer is built, make sure the t-shirt platen is not beneath the print head before a print job is sent.
PF Sensor (sensor that detects when paper is loaded) – paper jam may happen if the sensor is not triggered at the right time, not plugged correctly, or already triggered before even the print job is sent.
Example of a PF sensor.
The electronic parts inside the print head suffered a short circuit and is now permanently damaged.
Solution 1: Replace the print head with a new one.
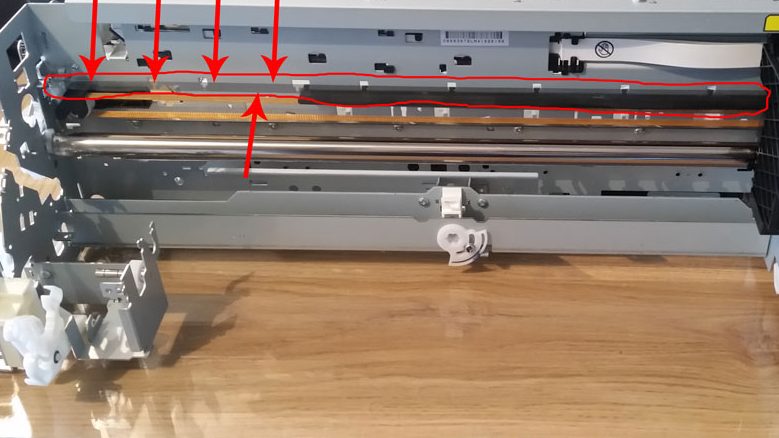
The print head uses a thin transparent encoder strip to position itself along the rail. If this strip is damaged, dirt, out of position, the print head will not know it’s current position and will cause it to move erratic.
Solution 1: Check the strip film.
It’s very likely that the garment fibers are slightly touching the print head nozzle.
Solution 1: Iron the garment before the print job.
Solution 2: Use a pre-treatment solution before a print job. The pre-treatment will make sure the fibers are flat and will even make the print come in higher quality.
Solution 3: Check if ink is not dripping while the print head is idle.
It’s likely that there’s a pressure problem in the cartridge or in the CISS.
Solution 1: If you’re using CISS, make sure that the external tanks are leveled at the same height as the print head. Also, make sure the air hole in the external tanks is opened.
Solution 2: If you’re using refillable cartridges, it’s likely that the cartridge itself is damaged, or not properly primed.
This happens when the front door cover is open / closed.
Solution 1: Check the main cover sensor. It’s located on the front right side near the capping station. (green circle)
*Ignore red circle. That’s the CD cover sensor.
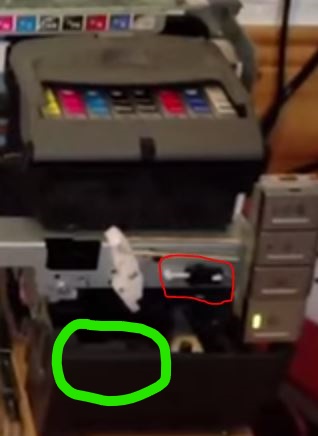
This happens when the CD cover sensor is triggered.
Solution 1: Make sure the CD cover sensor is kept straight or untouched.
See red circle. It should be kept in that position or else you will get the “cd cover open” error.
*Ignore green circle.